How to Make Biochar with Only a Match (and maybe a shovel too).
Have you ever wondered how to make biochar in a simple fashion? Did you ever wonder if it could be done without investments in metal? In this post I will share with you how to make biochar with only a match (and a shovel).
 In the beginning years of Hawaii Biochar Products (pre-cursor to Pacific Biochar) there were no fancy machines, only wood and sweat, lots of sweat. Starting in 2008, with a large supply of clean dry wood waste from local sawmills to play with, I developed a technique that proved to be a very efficient way to transform wood into biochar. Many different approaches were attempted, but the winning technique was the Open Pit or “Imu Style” Biochar Burn. This technique is very similar to the Japanese cone kiln design that has become popular, or what is now also called a Kon-Tiki Kiln.
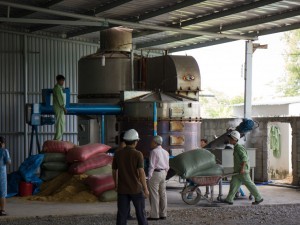
Pacific Biochar has access to far more advanced production facilities now, but this technique is still used for home production on my own farm and has been taught to many others for production on their farms. It is estimated that in the years from 2008 till 2012, more than 150 tons of biochar were produced and sold from my own backyard using this approach! This allowed for a lot of hands on experimenting and product development, the fertile ground for developing the products we offer today.
The concept is rather simple, but the details are important. I will cover the basic concept below.
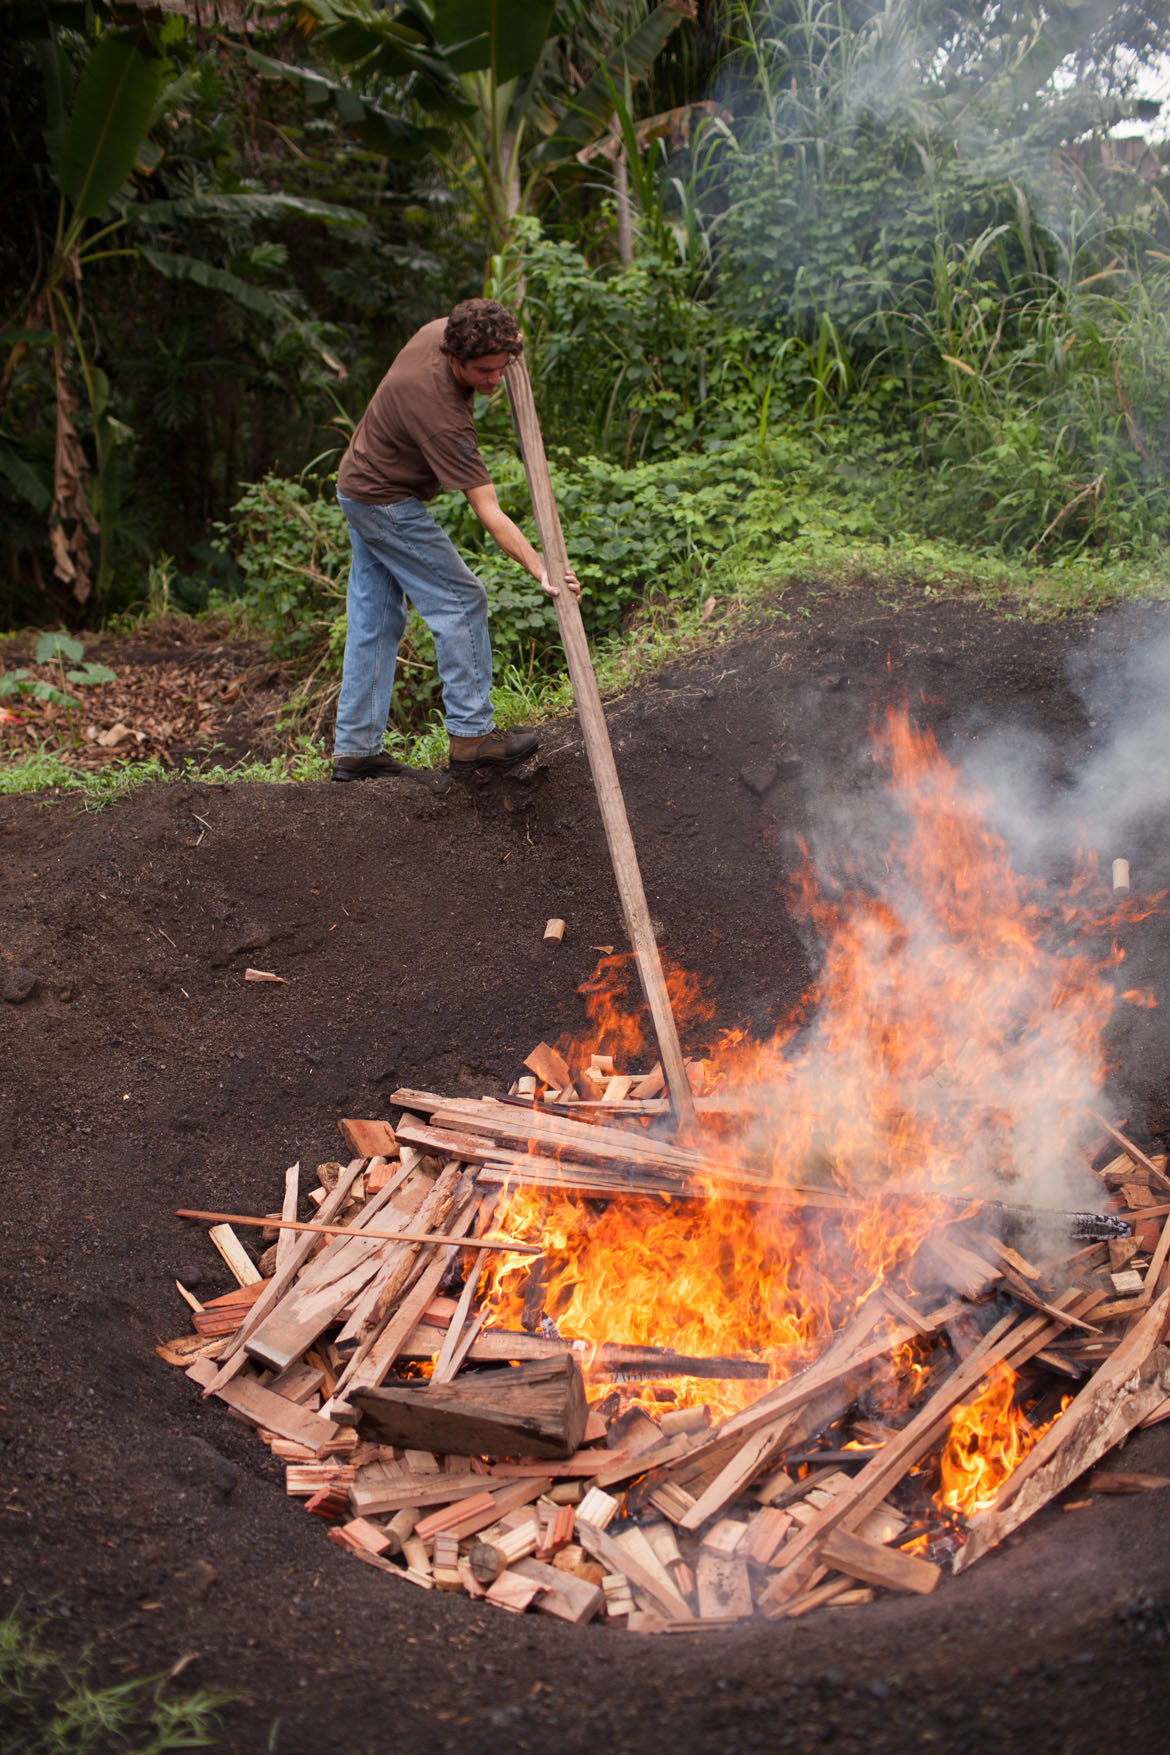
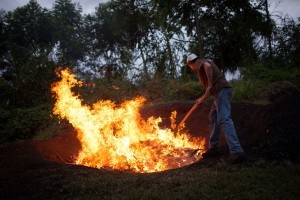
It all began on flat ground. It grew into a pit to gain greater air control. Wood burns twice, once from wood to char, then from char to ash. The second part can only happen with oxygen. On flat ground the biochar produced during burning is hard to protect from oxygen entering from the sides. In a pit, the biochar is covered with more wood as it is produced.
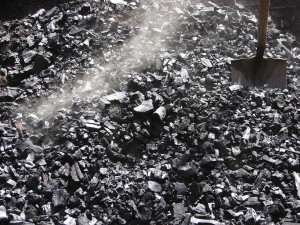
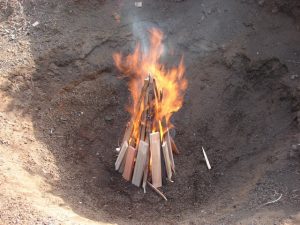
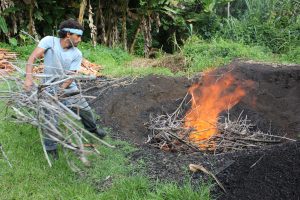
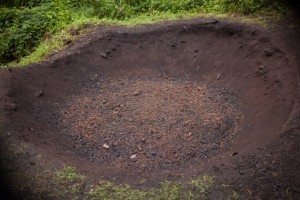
First, a fire is started in the bottom of a pit, then dry wood is then added as fast as the fire will allow – you must always push the fire near to the point of smothering it, yet without actually smothering it. It is important to always keep a clean burning fire – no smoke. If it becomes a bit smoky, back off, let the fire catch up. If it is raging, add more wood to choke it out a bit. In this way you are constantly covering the char that has been made with fresh layers of wood, which become char, which are soon covered with fresh layers of wood, which become char, and so on. When you near the top of the pit or the end of your wood supply, you finish with small diameter wood. This chars quickly. Let the flames die down a bit, then voila – a large bed of red hot glowing coals. By this point, if you have done it right, the entire pit has turned to char. You can either hose it down immediately, or when time allows, cover it with soil to snuff it out, then uncover it a few days later to harvest (using water for dust control). Look to the pictures below for a visual reference.


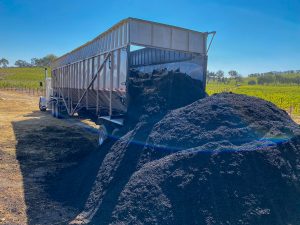
Harvesting and grinding the char is a job all unto itself. You must be very careful to make sure that all the embers have been extinguished or the entire pile can re-ignite. Always follow local fire safety regulations.
To cook in the pit, dig a hole in the embers, line the bottom with crushed banana stumps, place food wrapped in leaves, cover with embers, smother with soil, uncover later and enjoy.
Have Fun, Be Safe,
– Josiah Hunt


